10 Tips I Learned Using Interactive Notebooks in Social Studies
I have always been a fan of using notebooks in my social studies classroom. It provides a form of forced organization for students. In 6th grade, organization is often a challenge. So, any form of organization you can provide for students is beneficial!
The only thing is, I felt the notebooks were too teacher directed. I wanted to find a way to incorporate more student directed activities. Enter the interactive student notebook! The ISN seems to be all the rage right now in the education world. So, after a great deal of research, I decided to give it a try.
First of all, I discovered there was a TON of information out there for math and science ISNs. Finding examples for social studies was a bit of a challenge. But I planned out what I could, and hoped for the best.
Here’s what I have learned about using the ISN in the social studies classroom 2 quarters and 4 units later…
Tip #1 Table of Contents
I had no idea how many pages to save for the table of contents. I estimated one page per quarter. My class is 4 quarters, but then I added a 5th page just to be sure.
Here’s what I discovered: 1 page per quarter was about right…. IF the notebook was college rule. If the notebook was wide rule, the TOC spilled over.
Second, I didn’t expect to fill up the notebook after 4 units! Most of the notebooks students pick up from Walmart or Target are 70 pages. Yup, totally full. So here we filled in 2 Table of Contents pages, with 3 left, but no more room in the notebook!
And so, right before the holiday break, we set up a new notebook for 2nd semester. And guess what, we only made 3 TOC pages!
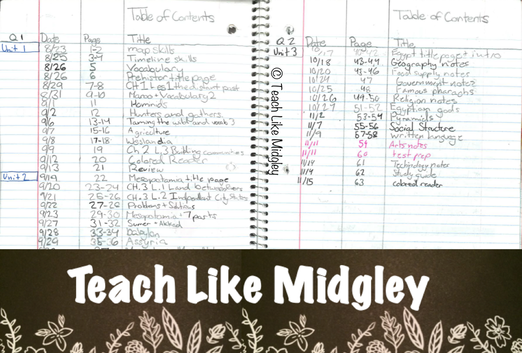
Table of Contents from a student notebook
Tip #2 Pockets
What a great idea – taking two pages, fold them over as a triangle, tape it to the cover to make a pocket. Genius. I wish I could remember where I read this idea. We made one in the front of the notebook and the back. The front was intended for Important Papers and the back pocket for pieces we hadn’t finished with.
Here’s what I discovered: The front pocket was great for the booklet I made of important information which included my syllabus, rules, and a place for students to record grades and write goals with reflections. When we made our new notebook for 2nd semester, we simply pulled the book out of the old notebook and stuck it in the new one. The back pocket, I think we used only once. So we didn’t make one in the new notebook.
Here’s what I discovered: The front pocket was great for the booklet I made of important information which included my syllabus, rules, and a place for students to record grades and write goals with reflections. When we made our new notebook for 2nd semester, we simply pulled the book out of the old notebook and stuck it in the new one. The back pocket, I think we used only once. So we didn’t make one in the new notebook.
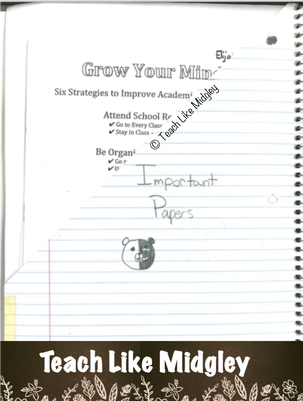
Front Pocket for Important Papers from a Student Notebook
Tip #3 Cut the Cutting
I am a stickler for utilizing EVERY minute of my class period and refuse to let it go to waste. Anything I plan to have students glue into their notebook, I trim down with my paper cutter before I ever give it to them.
Here’s what I discovered: This is SO important and saves a mess. My colleague uses the ISN in her science class and was always complaining about how much time it took for her students to cut and what a mess they made. Once she tried my strategy, it lifted a huge burden!
Here’s what I discovered: This is SO important and saves a mess. My colleague uses the ISN in her science class and was always complaining about how much time it took for her students to cut and what a mess they made. Once she tried my strategy, it lifted a huge burden!
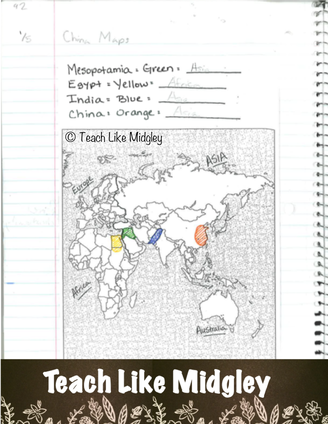
Map from Student Notebook
Tip #4 Glue Training
You have to train your students to use glue. There’s no way around it, unless you want a disaster. It doesn’t even matter that my students are in 6th grade. I have to teach them NOT to stick their pencils in the tops of the glue bottles and that you DON’T have to squeeze out gobs of glue.
Here’s what I discovered: Glue sticks don’t work. The materials end up peeling out. You have to teach kids to use one small dot in each corner of the paper, and you have to SHOW them what a small dot looks like ;) I have heard of sponge gluing… perhaps it would be worth my time to investigate.
Here’s what I discovered: Glue sticks don’t work. The materials end up peeling out. You have to teach kids to use one small dot in each corner of the paper, and you have to SHOW them what a small dot looks like ;) I have heard of sponge gluing… perhaps it would be worth my time to investigate.
Glued in Question Strip from Student Notebook
Tip #5 Bookmarks
We all know bookmarks make it easy to keep your place. For students, tying a piece of yarn to the top of the spiral makes a cheap, easy bookmark that will not fall out.
Here’s what I discovered: Since I used my teacher notebook so many times during the day, it became easier for me to use a small binder clip at the top so I could flip it open quickly. I don’t recommend binder clips for students, as they will probably end up getting them caught and/or loosing them.
Here’s what I discovered: Since I used my teacher notebook so many times during the day, it became easier for me to use a small binder clip at the top so I could flip it open quickly. I don’t recommend binder clips for students, as they will probably end up getting them caught and/or loosing them.

Diagram from a Student Notebook

Tip #6 New Students
What to do when you get a new transfer student? Of course you have them just pick up where the class is.
Here’s what I discovered: Have some notebooks already set up and that you can just hand the new student. It makes things so much easier and is a time saver.
Here’s what I discovered: Have some notebooks already set up and that you can just hand the new student. It makes things so much easier and is a time saver.
Notes from a Student Notebook
Tip #7 What Notebook Works Best
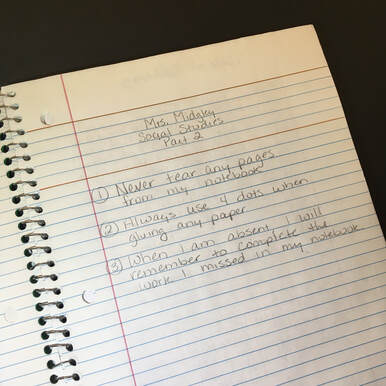
From the start of the class, I emphasize with students that they need a notebook ONLY for social studies class. They can’t put work from other classes, tear out pages, or draw in them because we will FILL THEM UP! (Which we have already done!)
Here’s what I discovered: The best notebook to use is a college ruled, spiral notebook, with 70-100 pages. The pages stay secured. I know many teachers like the composition notebooks, but they are too small. Since I cut/trim items for students to glue in, they often don’t fit well with the slightly smaller notebook.
Here’s what I discovered: The best notebook to use is a college ruled, spiral notebook, with 70-100 pages. The pages stay secured. I know many teachers like the composition notebooks, but they are too small. Since I cut/trim items for students to glue in, they often don’t fit well with the slightly smaller notebook.

Tip #8 Teacher Model
This is probably the most beneficial tip I can share. Keep a Teacher notebook as a model. Everything we do together as a class goes in it. Where I give assignments that students do independently, I write in the directions.
Here’s what I discovered: The teacher notebook makes a great visual for students to understand exactly what goes where, in terms of page numbers, dates, titles, and of course the activity itself. It is perfect for when students return from being absent and they want to know what they need to make up in their notebook. They can copy what we did together and get the directions for what they need to do on their own.
Here’s what I discovered: The teacher notebook makes a great visual for students to understand exactly what goes where, in terms of page numbers, dates, titles, and of course the activity itself. It is perfect for when students return from being absent and they want to know what they need to make up in their notebook. They can copy what we did together and get the directions for what they need to do on their own.
Title Page from the Teacher's Notebook
Tip #9 Student Directed
My initial goal for using the ISN was to include more student directed activities and get away from so many teacher directed note-taking.
Here’s what I discovered: Having a balance between teacher and student directed is definitely the way to go! In 6th grade students are learning what note-taking is all about, so the teacher directed is VERY necessary. But the student directed is just as great. As opposed to having students just answer some review questions at the end of a lesson, they are completing activities that require deeper comprehension. I’m not a fan of taking time in class to draw pictures. But sometimes, including diagrams can really help with student processing.
Here’s what I discovered: Having a balance between teacher and student directed is definitely the way to go! In 6th grade students are learning what note-taking is all about, so the teacher directed is VERY necessary. But the student directed is just as great. As opposed to having students just answer some review questions at the end of a lesson, they are completing activities that require deeper comprehension. I’m not a fan of taking time in class to draw pictures. But sometimes, including diagrams can really help with student processing.
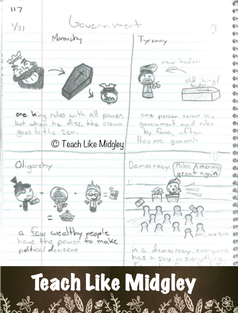
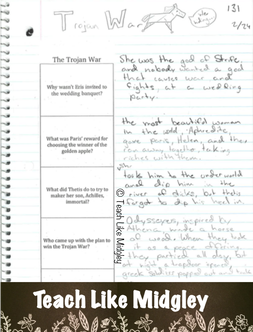
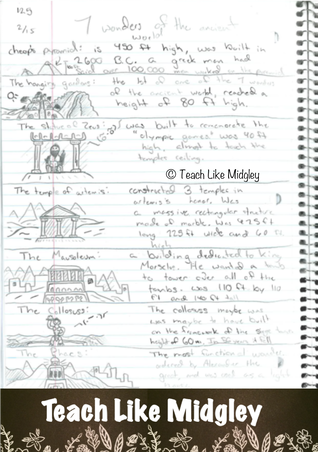
Notes and Diagrams from a Student Notebook
Tip #10 Teach Students How to Use the ISN
Putting the ISN together is one thing, but going back and using it is definitely another thing. Especially at the 6th grade level, you have to teach your students how to go back and reference their work. There are two main ways that I do this. At the start of every class, we do a quick review of what we have already learned. If there is a question where students get stumped, I say, “Pull out your ISN and let’s look it up!” The other way is when students are working in class and they can’t remember a particular vocabulary word or concept we’ve learned, I have them refer back to their notes and vocabulary work in the ISN.
What I’ve discovered: This is probably the most important skill you can teach your students. Using their notebook helps them understand why they do the work in the fist place and encourages them to become independent learners.
So what about you, do you use interactive notebooks in your classroom? What have you learned from your experience?
Ready to Roll Materials
Now that you've learned all the tips for using interactive notebooks in social studies class, you are ready to jump in and use these awesome notebooks in your own classroom!
Take all the tidbits I've learned to help you get started on the right foot! But if you don't have the time to do the research and gather and organize, you may be interested in some done-for-you materials so you can get your students started sooner rather than later.
If that's the case, I have just want you are looking for!
Get your systems all set and ready to go with the Complete Interactive Student Notebook Implementation Package! This package includes:
1 - Introductory slide show for presenting to students
2 - Student/Parent Guideline Pamphlet
3 - Peer Review Checklist
4 - Grading Rubric
5 - An additional article about why I developed these materials and how I use them
Next, you just might be looking for activities and materials for you and your students to put into your notebook! In that case, I've got just the thing for you, an entire line of Interactive Notebook Foldable Activities for Ancient Civilizations!
But if you are teaching virtually or in a hybrid model, you may be sitting here bummed you can't have students do notebooks... Have no fear! I have just the thing for you too! Check out my line of Digital Notebooks for Ancient Civilizations!
You Might Also Like...
Let's Connect...

Welcome! I'm Hillary Midgley, a veteran 6th grade teacher.
I create educational materials and develop curriculum for other teachers. I specialize in teaching students how to learn through my Study Skills Curriculum. I have established fundamental classroom systems and structures for teachers to help them streamline their classroom. And my passion is teaching ancient history through engaging activities with foundations in academic skills. Here you will find resources on all of these topics and more. Learn more about me here.

|

|

|

|