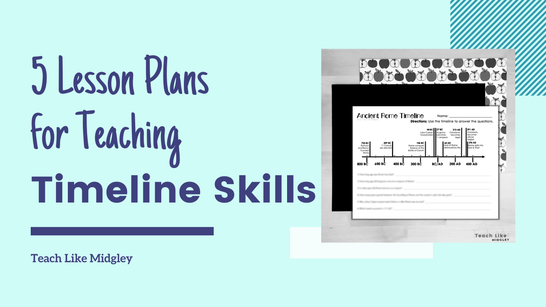
5 Handy Lesson Plans for Introducing Timelines to 6th Graders
Timelines are often first introduced to students when they study ancient history, which is common curriculum for 6th graders.
While there’s a good chance students have seen dates labeled with abbreviations, chances are slim that they fully understand what they mean.
While there’s a good chance students have seen dates labeled with abbreviations, chances are slim that they fully understand what they mean.
It is likely that students who have grown up in religious households are more familiar with the concept, because many religious writings include dates with these types of labels.
In this post, you’ll learn 5 handy lesson plan activities that you can use to help your students understand what timelines are, how they work, and how to use them.
In this post, you’ll learn 5 handy lesson plan activities that you can use to help your students understand what timelines are, how they work, and how to use them.
Use Positive and Negative Number Lines
It’s always helpful when you can build on the knowledge your students already have. Most 6th graders are familiar with the positive and negative number lines that are used in math class.
This is a great place to start with timelines, and is helpful to show students that the only difference, is that while a number line is labeled with the + and – symbols, a timeline is labeled with letters instead.
This is a quick easy way to help students see the concept in its simplest format.
This is a great place to start with timelines, and is helpful to show students that the only difference, is that while a number line is labeled with the + and – symbols, a timeline is labeled with letters instead.
This is a quick easy way to help students see the concept in its simplest format.
Teach Two Sets of Abbreviations
Once students understand that a timeline is labeled with letters, you need to help students understand what those letters are, and what they mean.
The most common system is the BC and AD labeling. But you will also want to inform your students of what these abbreviations stand for, and that they are based on the life of one person in history: Jesus Christ.
Side Note: It’s helpful to point out to students that you are not in a religion class. But you are learning history, and religion is part of history.
When teaching these meanings of these abbreviations, it’s always fun to see what students know. Most students can guess that BC stands for Before Christ. But most students will get the meaning of AD wrong.
I always preface the question with: Who knows what AD stands for? I warn you, it’s a tricky question, and you are likely to get it wrong.
Of course, many students don’t believe me and are even more keen on giving the answer after death. But this is the incorrect answer! And when I share this, I also state that I will prove to them that after death is an impossible label.
(If a timeline is based on someone’s life, you can’t have a period before their birth and then immediately switch to after their death. What about the time they were alive? It is said that Jesus lived to be 34 years old. Where would those 34 years be on the timeline?)
The abbreviation AD actually stands for a Latin phrase, Anno Domini which translates to, In the Year of Our Lord.
The BC/AD labeling system is related to religion. As we know, there are many people who are not religious, and so many historians choose to use a different labeling system: BCE, which stands for Before Common Era and CE, which stand for Common Era.
Your students are likely to encounter both labeling systems during their studies, and so it’s important that they know and understand both labeling systems.
However, whichever labeling system your textbook and/or teaching materials uses, is the system you should focus on for teaching timeline skills to your students.

Physical Manipulation
Next, you’ll want to get your kiddos moving around some dates so they can construct their own timeline.
A great way to get your students started right, is to give each one an index card that already has a date on it. Have them stand up, with their index card, and form a line across the classroom. Each student will need to stand in the correct numerical spot, forming a number line.
This activity gives your students a chance to collaborate and a chance for you to immediately address any misconceptions that arise.
It’s also great practice to have students do this in small groups or with a partner. The more the practice, the better they will understand the chronological order of a timeline.
Adding the Current Year
Most timelines encountered through textbooks and lesson resources will not include the current year. It’s helpful to teach students where the current year would appear on a timeline.
When you use worksheets, have students physically write in the current year.
If students are using a timeline from a text, have them write the year on a post-it note and stick it on the page.
It may sound like a simple concept, but your sixth graders will find more success if they can physically see the current year on the timeline.
Use Color Coding
Once you start using timelines to calculate years between events, some students may find it challenging to remember when to add and when to subtract.
Using a simple color coding system can really go a long way in helping your visual learners.
Draw out a timeline on white paper: only write the BCE years on one page and then write the CE years on a second page.
Photocopy the BCE years on blue paper. Then photo copy the CE years on pink paper.
Cut out the strips and then have students lay the two side by side. Use blue for the BCE because it’s farther away (in the past) and when you get far away you get cold (blue). Use pink for the CE because it’s closest to you (present day) so when it’s close it’s warm (pink).
It may sound like a silly concept, but it’s the silliness that makes it work for students. A simple modification that can really have an impact.
Bonus Strategy
You’ll want to review and practice using timeline skills with every unit that you study throughout the school year.
Just like most skills, your students will also find more success if they get consistent practice using the same format.
Just like most skills, your students will also find more success if they get consistent practice using the same format.
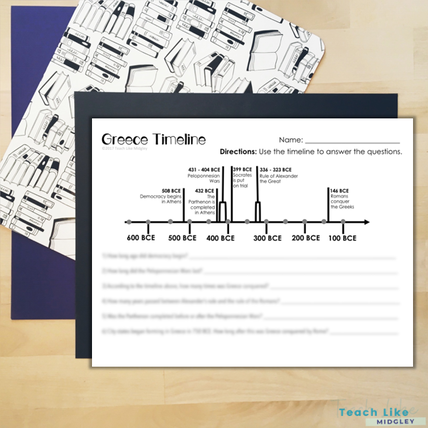
Ancient Greece Timeline Practice available in my TpT Store
Ready to Roll Materials
Now you are ready to get those lesson plans together for teaching your students about timeline skills!
But as we know, sometimes it can be difficult to find practice materials. Which is why in true Midgley style, I have some done-for-you Timeline Practice for each of the ancient civilizations. Be sure to click and check them out!
But as we know, sometimes it can be difficult to find practice materials. Which is why in true Midgley style, I have some done-for-you Timeline Practice for each of the ancient civilizations. Be sure to click and check them out!
Let's Connect...

Welcome! I'm Hillary Midgley, a veteran 6th grade teacher.
I create educational materials and develop curriculum for other teachers. I specialize in teaching students how to learn through my Study Skills Curriculum. I have established fundamental classroom systems and structures for teachers to help them streamline their classroom. And my passion is teaching ancient history through engaging activities with foundations in academic skills. Here you will find resources on all of these topics and more. Learn more about me here.

|

|

|

|
